Friday, April 24, 2015

Pallet Herb Garden Project

Hey friends!  I hope everyone has a fun weekend lined up!  If you're looking for fun... you can find it here!  


During my second year of grad school, we worked on a project for a fantastic group of people outside of Atlanta.  We designed areas for working and learning for special adults--and working with these folks was amazing!  They were so honest in telling us what they liked and wanted from our designs, and they were so extremely nice and happy to work with us.  For this project, a friend and I developed a garden space with raised beds so those in wheelchairs could access them--because everybody loves to pull weeds!  Also, to go up against a building in this garden space, we designed a vertical pallet planter.  When I say "designed," I mean that Buck and I took apart a pallet and put it back together to make a small vertical planter.  And I wrote a guide telling how we did it. 

Our designs needed to be low-budget, so the pallet fit that criteria.  Also, we used untreated pallets because we didn't want chemicals from treated wood to leach into the soil!  And lastly, we were looking for things that volunteer groups could do, so we had to write step-by-step instructions.. and that just happens to translate perfectly into a nice blog format.. just in time for some weekend fun!  And during this beautiful spring weather, no less! 

If you find yourself with limited dirt.. this project goes vertical so you can grow herbs... Perfect for a city dweller!  And if you have plenty of dirt, but need a rack for storing canned tomatoes, pickles, (violet!) jelly, etc... or wine.. this pallet shelf holds 750 ml bottles of wine and pint mason jars perfectly!

Things I like about this project:
1. It works for small spaces!
2. It's perfect for growing herbs.. you can move it into the sun or shade.  Or inside if you're trying to overwinter your herbs.  And, I. Love. Herbs.  Especially this time of year in vinaigrette dressing.
3. It also holds wine and/or canned yummies.  
4. It's cheap.. basically free if you already have the tools and the screws.  

But, since it is untreated, it will deteriorate over time.  The one we made in Athens and I used as my herb garden was two years old and still doing the job.  Unfortunately, Buck made me chunk it.. he refused to move it to Winston with us.  Boooo!

Without further ado, let me share these (super serious and seriously boring) pallet planter/shelf instructions with you!

Vertical Pallet Planter Instructions 

Materials Required:
Pallet (measuring approximately 4'-0" x 3'-4 1/2" x 0'-4 3/4")
Exterior Screw (1 5/8")

Tools Required: (See Figure v1)
Hammer
Pry bar
Drill Tape measure
Hand saw or circular saw  

Other:
Soil mixture and preferred transplants and/or seeds
Mulch (such as pine straw)

Figure v1 (tools)

Note: The available pallets may vary in size and number of boards, and type of wood.  Depending on the design of the pallet, alterations may have to be made to these instructions.  It is suggested that you find a pallet similar to the one described below if you do not wish to make any changes.  However, with a little bit of planning, it can be fun [!] to design your own pallet planter, with a different number of planting shelves.  Just make sure that when you are planning your pallet you have enough boards for the front, back, and bottom of each planter shelf.  You may have to pry some boards up and rearrange them to make the pallet planter look as you want.  You will need to plan which sections to keep for planting shelves, and keep in mind that you will need a board on the front and a board in the back to be even with each other in order to create a planting shelf.

The pallet pictured has seven 3/4" x 5 1/4" boards spanning horizontally on the top, or what will from now on be referred to as the front (see Figure v2).  On what will be called the back, it has two large (3/4" x 5 1/4" actual) and three small (3/4" x 3 1/4" actual) boards running horizontally (see Figure v3).
 
 Figure v2 (front of pallet)
Figure v3 (back of pallet)

The pallet in the pictures is a hardwood pallet, but with each pallet, care should be taken when removing boards.  The board may split, especially around knots in the wood.  To pry up a board, use the hammer to tap the pry bar between the boards.  Once you get it started, begin prying up the board little by little.  Do not try to pry the board up all the way, but instead tap the board (not nails) back down with the hammer and the nails will be protruding up.  Use the nail removing slots on the pry bar or the hammer to remove the nails and keep the board intact.
 
To build the pallet, follow each step below. 

1.    Pry up all boards that need to be relocated or removed to make the planting shelves.  To decide which boards need to be relocated, realize that some boards do not align well with the boards on the opposing side.  These boards should be carefully pried up and realigned. 
·      For this pallet, the top board should be kept.  It already has a board directly opposing it on the back side of the pallet. 
·      The second board will need to be sawed (explained below).  It will serve as the base of the top shelf.
·      The third front board will be kept.  One of the smaller boards on the back should be directly opposite the front third board, onto the back side of the pallet.
·      The fourth board from the top, the middle board, will be sawed.  It will serve as the base for the second shelf from the top.
·      The fifth board from the top will remain, serving as the front board for the third shelf (from the top).
·      The sixth board from the top will be sawed, and should serve as the base for the bottom shelf.
·      The bottom front board will remain in place. 
·      On the back, the two boards that directly oppose the second and third shelves will remain.
·      The board on the back that does not align with a board on the front is to be sawed and will serve as the base from the third shelf. 

(What I'm saying is match up the boards that work for a front and a back, and saw the others to use as a base for the shelf.  Rearrange as needed.) 

2. Using a saw, cut the board that you will be using for a base.  The base of one shelf will have two sections, each fitting into the slots between the three vertical supports.  There will be two cuts for each section of the base—both to the interior of the vertical frame boards.  This section of board that you are cutting out will then be the exact fit needed for the base sections.  Make these cuts.

3. The small pieces of wood still nailed onto the vertical supports can now be pried up.

4. Fit the sawed boards into the base section that they are to occupy as directed in step one.  You may need to use the hammer to tap the bottom into place (see Figure v4).  Do one section at a time.  Make sure that each base is flush with the front and back.


Figure v4 (tap bases into place)

5. Have someone hold the base in place, and use a 1/8” drillbit to create the hole that the screw will be screwed into later.  This step is necessary to avoid splitting the wood.  Only two screws will be needed on the front or back of each base section.  Four screws total will be used for each base section.

6. Now use the drill to screw the screws into the holes you just created.
7. Repeat this step for each base section (see Figure v5).


Figure v5 (detail of shelf)

8. If desired, you may now line the shelves with a geotextile fabric.  However, this pallet has not been lined, and though the geotextile fabric will prolong the soil to wood contact, the wood will still be moist from the start, and the decaying process is expected to begin immediately.

9. Now the vertical pallet planter is ready for soil.  This particular pallet will hold approximately 1 cubic foot of soil.  Fill the shelves with the soil, leaving room to plant seeds or transplants.

10. Plant your seeds or transplants.

11. Fill up the rest of the volume with the soil.  

12. Now, place the mulch/straw over the bare soil where the transplants are planted, but not where seeds are planted.  Once the seeds germinate, place mulch around them too.  The mulch will help keep the moisture in, and is an important component, as the shelves here do not have the ability to hold much water, therefore dry out very quickly.


13. Be sure to regularly water your pallet garden!  If possible, use water from rain barrels.


Figure v6 (finished pallet)


Sage growing in the pallet planter... I love sage... It's delicious in dressing, butternut squash risotto, salad dressing, and stews like the one I just made.

I recently made osso buco (osso meaning bone, buco meaning hole-per Wikipedia), but I substituted the deer neck (with a hole) with a turkey leg (with no hole).. So I guess I made Liza's osso turkey lego.  And I used sage in it.  I flippin' love sage! 


Here's the sage and lavender coming along in the planter.


Some dill I started from seeds in the pallet planter.


Anddddd... some rosemary I started from a cutting.  Mmmm.. rosemary always makes me want rosemary cornbread.  Always.  

Y'all in South Georgia!  Stick ya some citronella and basil in there... I read both help keep skeeters away... and Lord knows, it's worth a shot.  Though if you're in South GA, I doubt you have a shortage of dirt and need a vertical planter...

If anyone makes this, please share pictures!  I hope it makes sense.. even though reading it is as boring as using the bathroom without your iphone.

:)
 
Happy palleting!  And most of all, happy weekend!

Tuesday, April 21, 2015

Turkey Huntin' and Turkey Eatin'

Hallelujah, y'all. It's turkey season in North Carolina!

My darlin' recently caught a turkey on film with his game camera. Or I guess I should say on.. Digital? Pixels? Whatever.

He's huge!  And my darlin' is so hardcore, he took a picture with his phone and sent it to me at work... just to get me excited.  It's true love, y'all. 


First of all, my man is the best turkey caller on both sides of the Mississippi. You know that feeling you get, sitting in the woods with your man when he lets out a few clucks.

Or a yelp.

Or a purr...

Or good gracious... That kee kee run!

I don't know when we are going to have a baby, but if we do, you can bet it'll be approximately 9 months after turkey season.

I'mmmmm cutting up.  Kinda.

And Buck is humble; he doesn't think he's the best caller, but I do.  So what if I've only ever really heard only him call.

So, we're hunting... 

And he's like, Liza--sit still! And Mosquitoes are swarming your face and you're trying to inhale all those awful fumes coming off the ThermaCell.. Then you realize the ThermaCell is dying.  Really, I need to come up with some natural herbal repellent that works and works great.. Mosquitoes in my ears buzzing while I'm trying to listen for a turkey ain't cool.  Any of you essential oil folks got any ideas?

Ok, so last year, in South Georgia, I killed a good 'un.  He was with a big group of hens, living the dream.. We had to watch him from the blind we built out of tree limbs and palmettos (classic South Georgia) the day before. We couldn't see him that well, but could hear him. Some hens were walking around and one came real close, and we thought we were busted.  But, she went on about her business, never alerting any of the others.

This was after we were hunting in some small pines one day when this monster gobbler started our way.. With all his ladies ahead of him. There were like three hens coming at us.. coming at us, and then they were right there!  About 5-6 feet from us!  I'm trying to be still, but my heart is about to jump out of my chest and to try to calm myself, I decided to slowly close my eyes. Do yall know how good turkeys can see?!

Before I even got my eyes closed, one hen saw my eyelids move, caused a ruckus, and that monster macdaddy cut across the meadow and into the woods, out of gun range.

Well, Buck said it was out of gun range... But, the year before I got one at 57-60 yards.  Buck says I'm lying, but I stepped it off and steps don't lie.  When you're alone.  (Hehe!)

So last year's turkey.. We thought he had walked off to tend to a lady friend.  We started to get up, and then that thunder chicken let out a boomin' gobble that quaked all the way to the heart of the Okefenokee.  We both wet our pants and sat back down faster than a bullet leaving a gun. 

He gobbled once or twice more before he walked into view and Buck clucked.  Then that bird stuck his big red head up.. And I put the bead on it.


 And then I carried him out.


And I posed for pictures.. because redneck girls do that kinda thang. 


And now I'm going to tell you how we cooked him. And several of the others Buck killed.  (He's a way better hunter than I am... and the main turkey winner for our home.)

Thanks to my mother-in-law for telling us how to cook wild turkey breasts.  This is really her recipe. 

We skin the turkey and save as much of the meat as we can... because, why would we waste any?  If it's cooked right.. it's all delicious. 

For this recipe, we use the breasts.  We use the legs in stews and other dishes.  For excellent ideas of how to cook the legs, refer to the Afield cookbook by Jesse Griffiths.  His stuff is amazing!  One of our favorites for the legs is a tomato braised turkey leg stew.  The acid in the tomatoes, along with some red wine, helps break down the tough leg meat... and it is so good... But, this blog is about how we cook the breasts.. so moving on to our fried wild turkey breast recipe. 

First, brine the breasts.  Two days before cooking, or before you put them in the freezer, put the breasts in lukewarm water with a brining blend.  Or make your own brine using whatever spices you have.

When I make my own brine, I use:
Salt (to help pull the wild flavor out)
Sage
Rosemary
Oregano
Thyme
Crushed red pepper flakes
A bay leaf or two
Black Peppercorns

I use almost a tablespoon of salt and a good palm full of the spices mixed together.

After a day or two in the fridge (shaking intermittently), I pull out the breast (we package them individually because one is enough to feed us two a couple of meals). 

We cut the breasts into bite size pieces and soak them in Texas Pete for 1-2 hours.


And make sure while you're cooking, you are wearing super sexy shoes.. like this:


It makes the turkey taste better. 

Then, toss the turkey pieces in flour.  If you like it hot, throw some Slap Your Mama in there.. Though it is not a very well-behaved seasoning, it does taste pretty good.


Then simply pop them into the fryer.  (No, we don't coat them in an egg batter or anything.)


Give them a few minutes...


And then...


Make sure the person frying them keeps his greasy fingers out of them, so there will be enough for supper!


This particular night we had fried turkey with rice and tomatoes and baked cabbage with a bacon vinaigrette..  The cabbage recipe is from Bon Appetit, and it is one of our very heart-healthy favorites.  In regards to seasonal eating.. well, the tomatoes are a summer vegetable and were canned, but cabbage is a cool season crop!

Since I'm talking about hunting and eating turkey, I have to mention the responsibilities that come with it. 

If we are going to hunt, we must be responsible hunters--not just safe, but responsible for the land and the animals.  We have a duty to protect both.  In Genesis 1:28, God told Adam and Eve to "Be fruitful and multiply, fill the earth and subdue it; have dominion over the fish of the sea, over the birds of the air, and over every living thing that moves on the earth."  Whoa... talk about responsibility.  Fill the earth.  Replenish it.  As Wendell Berry points out in his essay, "God and Country," this verse is a call to stewardship, and if we are trying to "subdue" by taking and destroying, we won't be successful in replenishing. 

 Stewardship means harvesting game when they are mature.  It means harvesting the correct amount for the property you are hunting, or in other words, maintaining the correct carrying capacity.  And if we are going to take away, we must give back.  We give back by maintaining good predator control and improving habitat.  Prescribed burning is one of the best ways to maintain habitat for the wild turkey.  Not corn or millet--though corn may be the easiest.  Enhancing the natural forages that the turkeys are accustomed to is one of the best ways to give back.  Only so much may be taken from the land without giving back.  

And I'm going to take a risk here and hope my father-in-law, a devotee of pine trees, doesn't read this!  An important part of habitat is diversity.  A stand of 100% pine trees with no other sources of food may be a great place for a turkey to strut and show off his sexy tail feathers, but hardwoods (specifically oaks and other fruit bearing trees) are crucial to the turkey's diet and maintaining the flock.  Wouldn't you be ticked if you were only feed bologna?  Everyday!  We wouldn't be as healthy either.. just like us, the turkeys need a diverse and healthy diet.  Since we are manipulating the natural habitat for our monetary benefit (in many cases), it is up to us to realize the effects of our actions and help protect the wildlife that it directly affects.  Because whether we immediately realize it or not, the diversity of our habitat affects our health--and the turkeys and the buzzards and the bears (etc... etc... etc...) are all part of that.

I think the Native Americans and our early ancestors in the Old South realized this.  They had the skills to live off the land and maintain it so that it could provide for future generations, and today many of us do not have those kinds of skills.  (We just have like, basketball skillz, and Nintendo skillz..)  Perhaps it is because we do not have to have survival skills with Walmart and Piggly Wiggly so close.  But, that reliance on industry and government for our food (and what's in it!) makes us less independent.. and less free.  Plus, hunting (and gardening) provides us with an intimate connection to our food.  And hunting also personally gives me a greater respect for life (and death).  That's one reason I feel obliged to eat all I can from the whole bird.  That, and because he's "organic," and I'm so old south new...

PS:  Please "follow" Old South New over on the sidebar (to the right).  The violet jelly giveaway is coming up on Friday, May 1!  

Wednesday, April 8, 2015

Sandwich de jour: Prosciutto and Arugula Sandwich

Hey friends!  I was making my lunch yesterday and thought, I should share this on the blog!  It's a new favorite of mine, and so quick and easy...  And, it helps use up that arugula in my garden that is growing like a weed.  (By the way, I really don't plan on writing about food in every blog.. but, I do  love to eat...)


Big ag, thanks for your help with the prosciutto, cheese, and flour in the bread... Maybe one day I'll have my own pigs and can make my own American prosciutto.  I see it on menus at fancy restaurants... but I see through their pretentious menu... They should just call it cured ham. 

Prosciutto... ugh, that word.  I always hesitate to say it when I go to the deli meat counter... I'm thinking, "Is it pros-kew-toh? or pra-shoo-toh?"  Then I just smile and say it fast... knowing full well they can hear that hard "C" if I decide to pronounce it on that particular day... 

But, yeah, apparently it's more like pra-shoo-toh.  And apparently it's an Italian thing.  So, for your fancy, if not pretentious, Italian sandwich you need:

Rosemary bread
Cured ham (proscuitto)
Cheese--provolone or mozerella
Arugula
Balsamic glaze
Olive oil

Rosemary and olive oil, rosemary and garlic.. focaccia, whatever bread you like really.. I prefer the Rosemary bread from Winkler Bakery in Old Salem, made by the Moravians.

Did you see mayonnaise on there?  Nope!  How un-southern of me?!  A sandwich without mayonnaise! 

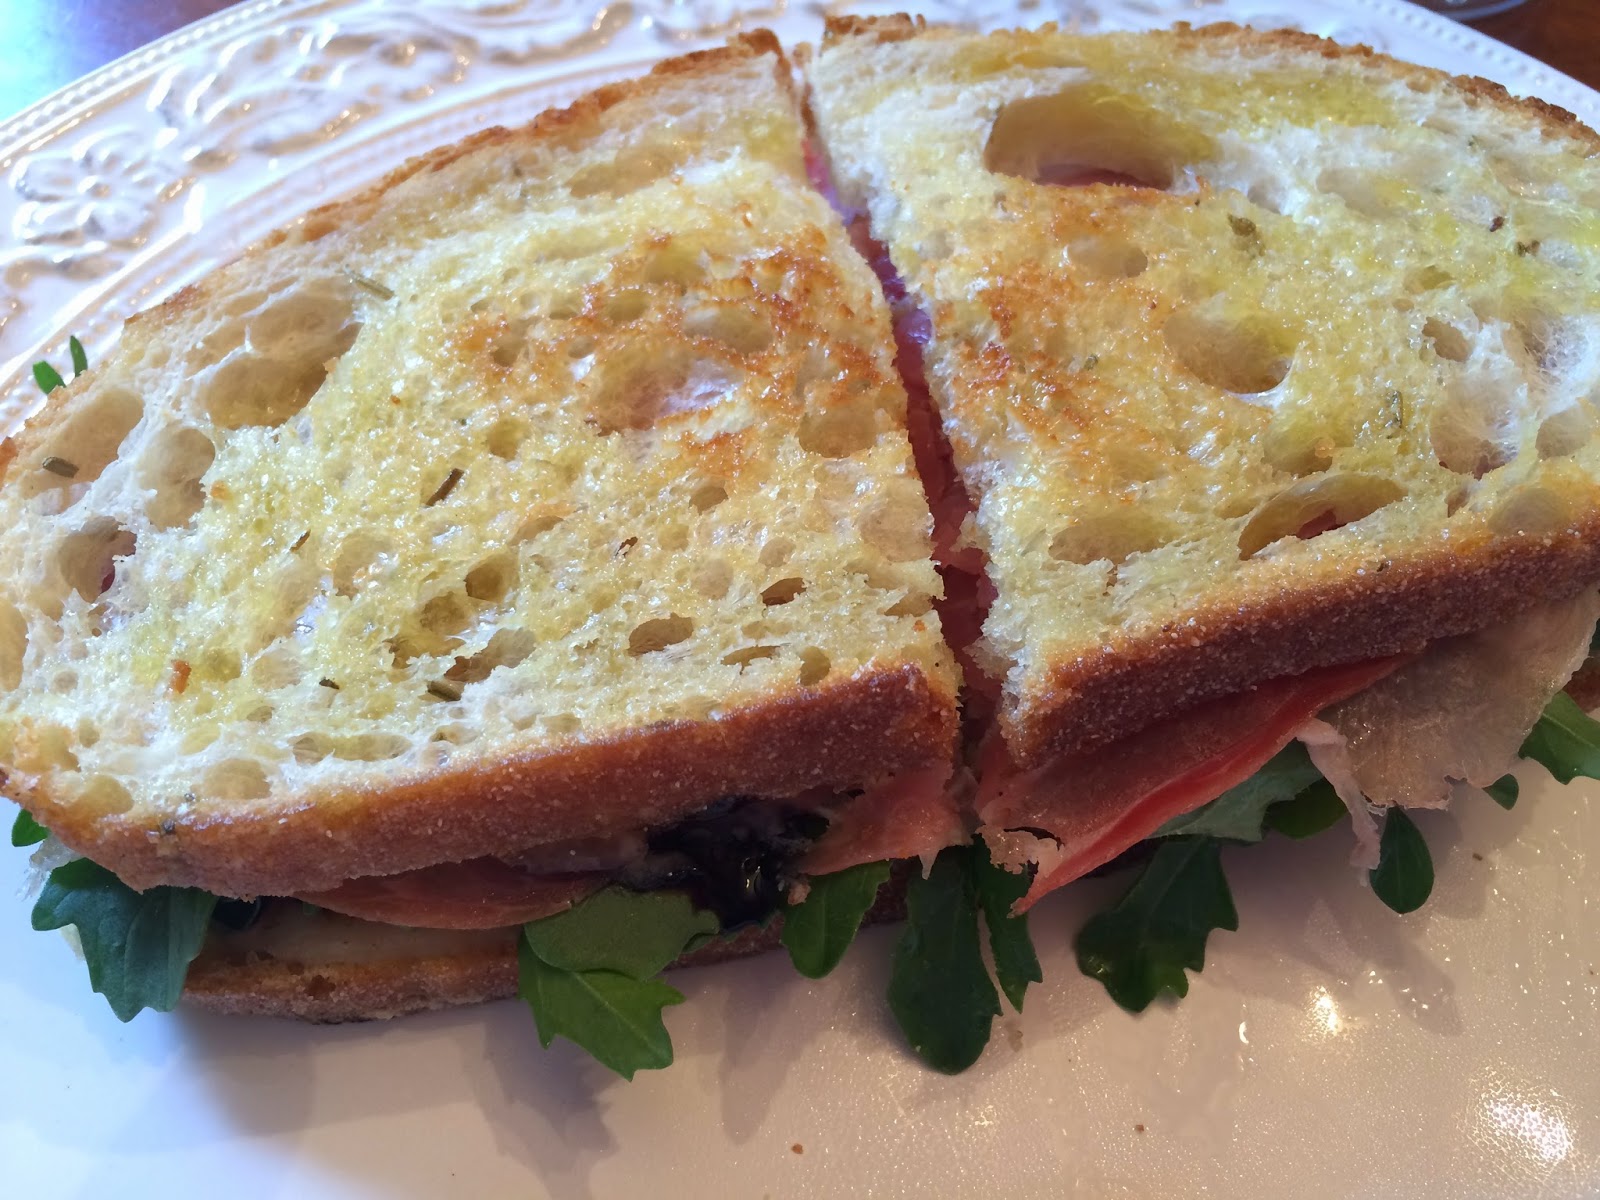
Ok, put the bread in a skillet and drizzle with EVOO.  Flip it, drizzle the other side and brown both sides to your satisfaction.. and if you can't get no... satisfaction... well, I'm sorry... bless your heart. 


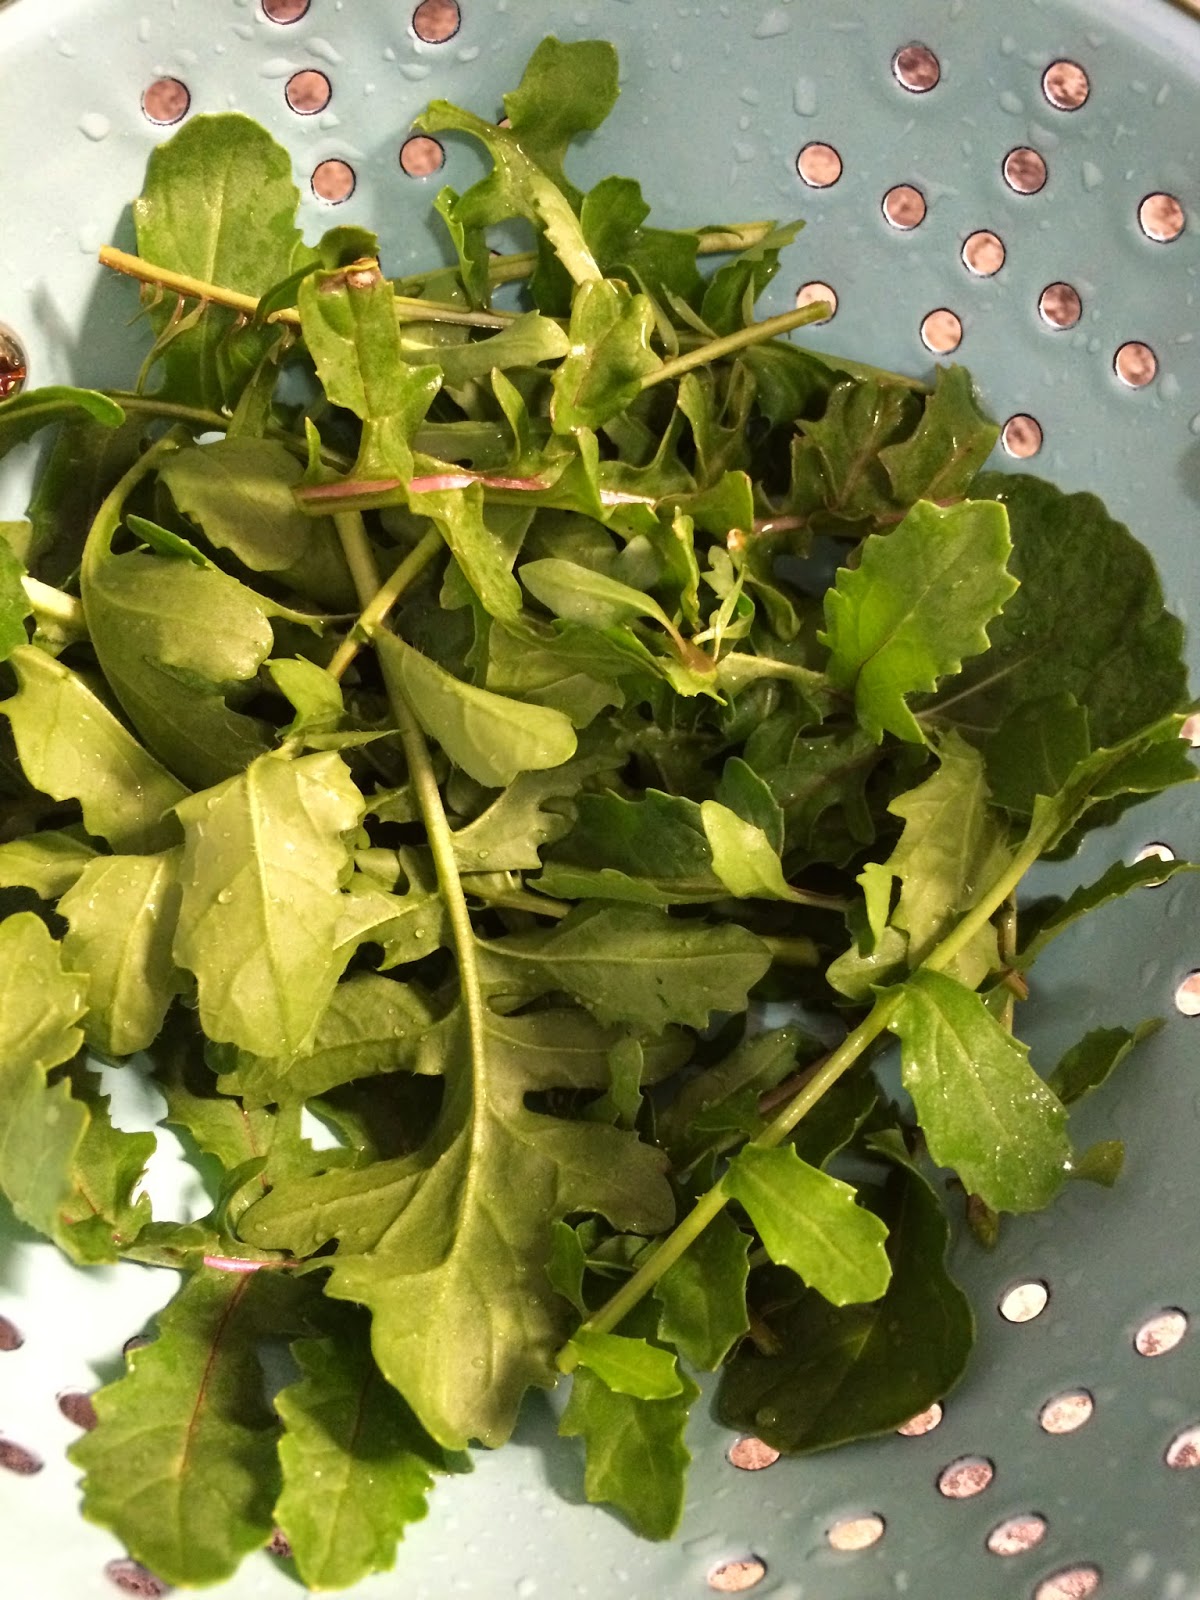
Meanwhile, step out in your garden and trim off some arugula.  Or grab some out the fridge.


I like a good handful to make me feel healthier.  Rinse it.  Rinse it real good. (If you use chemicals.) 


While the last side of the bread is getting crispy, throw two slices of cheese on there to let it melt a little.  Then take the bread off the stove.


Add your proscuitto on top of the cheese.  Put the arugula on the other slice of bread.  Drizzle that with balsamic glaze and get some on your finger so you can lick it off.


Then flip the ham and cheese over onto the arugula (so all the arugula doesn't fall off), and slice it down the middle... then eat that mess up. 


You could probably use thin-sliced ham instead of prosciutto.. or maybe bacon!  I just got real excited about that idea.  I LOVE bacon.  Ok, I'm going to try this and I'll let you know. 

Also, has anyone else ever heard that slicing a sandwich releases the flavors?  Is that something someone made up and told me when I was younger?  Something like, all the vitamins are on the outside of the bread, in the crust.  Really?  It's bread baked and browned on the outside--made out of the same dough... it's not like a watermelon rind or potato skin or something.  Quit lying to me to get me to eat all the bread.  (I promise it was not my mama that told me that.. I don't remember who it was!)  But, slicing a sandwich seems a little more legitimate... at least it's easier to eat that way.. and it takes me two minutes instead of three if I were to leave it whole.  Ohhhh, the satisfaction...

Wednesday, April 1, 2015

Roses are Smelly, Violets are Jelly

Hey y'all!  This is me starting a new blog!  It's supposed to be a blog on how-to.. though I fully expect it to be more of a how-not-to... please, learn from me learning the hard way!  It's Old South New, because I want to take the best of the old and make it work for the new.. My grandparents taught me so much, and I don't want to lose that important knowledge that helps make us independent and free.  I want to expand on it and adapt it in cool news ways... like making violet jelly.  


And before I forget (and if you like this blog), please "follow" me over on the right side of the page.  In a few weeks, I am going to do a violet jelly give-away to one of my "followers"!  (Old school name-out-of-a-hat-thing.)  And then I'm going to ask my "followers" to jump on a comet.

I'm kidding, of course.  This is not a cult, just a blog.  Welcome to my very first post!  So, about these violets. 


Beautiful violets... gracing my eroded, clayey hillside. 

A little about violets: Violets like moist, well-drained soil with winter sun and summer shade... hey, I like winter sun and summer shade too.  I hear they like low calcium soils too.  I guess my yard isn't drinking enough milk.
And did you know violets were a symbol for Athens, Greece?  They were traded in the Greek agoras back in the day.  The name "viola" apparently comes from the Greek myth of Io, one of Zeus' poor loves.  See, she was turned into a cow, and was given violets to eat to help her feelings.  So basically, you'll have a body like a Greek goddess if you eat violets.  So what if she was a cow.

(Thanks to Gardens Illustrated for this quick history.)

Let's discuss a few things first.

1. Seriously?  Is a jelly made from violets tasty?  I think it is!  It reminds me of a jolly rancher!  And... it's so pretty! It's a beautiful pink color.. I feel so Marie Antoinette having it on my toast.  I can see it going over really well at a little girl's tea party.. Seriously, there's something that makes me feel really fancy about eating violet jelly.  And something that makes me feel really peasant-like about foraging for food.
Did peasants have down jackets and mason jars?  While I'm thinking about it.. if possible, gather your violets on cool days--less bugs are out and about, which, to me, means no washy. 

2. It's super easy.  I was scared of jelly making--though my butt is not.  Still, I was afraid it wouldn't jell.  Right?  You've heard all the jelly horror stories, and surely you've had runny jelly.  I just looked that pectin square in the face, and threw it in the hot water!

(Also, I googled "jell" and "gel." Jell is a verb meaning to become firmer/thicker, and gel is the actual thicker substance.  I see "gel" everywhere, so I was second guessing myself.)

3. This is a recipe for low-sugar violet jelly.  There are a lot of recipes out there for violet jelly, though no one that I've mentioned it to has ever heard of it.  And as I recall, South Georgia really grows more bahia grass than violets, so maybe that's another reason.  But, here I am in the Piedmont of North Carolina with a yard FULL of violets.  I googled, "things to do with violets," and here we are.  Many other recipes out there are fantastic, and many kinda say the same thing.  My problem was that I wanted low sugar, which really narrowed the field.  And I could only find the Ball brand low sugar pectin in the stores--and I wanted low sugar.  This does not come in pre-measured packets, so I was frettin'.  Some darling canning queen wrote this long story about how Ball had changed things up, and I'm all confused, because I hate to admit it, but I had NEVER made jelly before.  (I'm sure my Mema is ashamed.)  Apparently, what is one packet of low sugar Sure-Jell is equal to 3 tablespoons of Ball low sugar pectin.

And my goal in sharing this information is to hopefully give you some more quantitative instructions.  Like I said, I was afraid of jelly not jelling, and so when I read things like, "bring it to a boil and then reduce until thick" without any time or heat quantities... My jelly anxiety went through the roof.

4. I'm sure the fine folks over at the jelly conglomerates are doing business with the health of the people as their first and foremost priority.  Money is nothing and you should put whatever in food to make it taste good.  Whaaaatt?? You don't like a little high fructose corn syrup to go with your heart disease, sweetie?  Ok, obviously, we know shouldn't eat too much sugar (even pure cane sugar), so go easy on the jelly--though the recipe I'm about to share is "low sugar," it is not sugar free.

No really.  Here's the deal.  I want to (one day) be independent from the industrial food system.  I want to be responsible for my food instead of someone else who may or may not care what they feed someone they don't know.  Making jelly from this beautiful wild flower (or weed, depending on your outlook) is one way for me to do that.  Oh, thanks Ball for making the pectin... I am totally dependent on you. 

5. Also, I did read on the internet (so I know it's true), that violets are a mild laxative.  Heehee.  Put that in your colon and poop it. 

Or if your plumbing is a little backed up, go out there, drop down on all fours, and get to grazing.    


Gathering the violets:
I'm so fancy, my weeds... I mean.. my violets are organic.  Most other violet recipes say to gather your violets from a place that hasn't been sprayed with chemicals and in a place where your pets don't potty.  I say, it depends on who you're making it for... I mean, if it's a person you don't really like... let's say maybe you do gather them from the area where your dog does dirty business. 

But you won't want to give this jelly away, so let's get crackin'.

First, gather about 2 cups of violets.  Make sure they are violets and not vinca (aka periwinkle).  Periwinkle is a chemo drug.. you don't want to be eating that.  You can identify violets by their heart shaped leaves. 
See.  Heart-shaped leaves.  And... they are purple. 

Ingredients:
2+ cups of violets
2 cups of water
1/4 cup of lemon juice
2 cups of sugar
Low sugar pectin (I used 3 tablespoons of the Ball brand low sugar pectin)
...and time and love, darlin'.

This is the Ball "Low or No Sugar" Pectin I used.  (And beside it are my jar lids... you see that?  Made in the USA!  Good for you Ball... American jobs, not Chinese imports.)

Note:  You may want to wash your violets, especially if it is a warmer day with bugs crawling.  But, then again... come on babe, take a walk on the wild side...

Yield: (4) 8 oz jelly jars.  That is the goal... Good luck... the last one may be half full, if you're optimistic.  My yield varied, but was usually around (3) 8 oz jars and (1) 4 oz jar.. it depends on how you skim it, I think.  

Method:
I boiled 2 cups of water and poured it over my 4 cups of violets in a quart mason jar.  I let it sit from 7pm until about 6am the next morning.  (Not by choice, my darling husband left for work at 5:30am... we don't do this for fun.)


I strained the water into a measuring cup to make sure I had two cups of water.
You see how dark it is?  The pictures I saw in my recipe search had the water looking a lighter, pretty blue-purple color.. not like Okefenokee swamp water.  So, I decided to bust up the two cups of navy swamp water and dilute it.. and make two batches for the first try.  (You know, just in case.)  I poured one cup of swamp water into another measuring cup and added one cup of tap water, equaling two cups of more blue-purple water.  I made the third batch with darker water, and this created darker jelly.  I had the same dark water for the fourth, so I decided to do 1.5 recipes.  This gave me a lighter, pinker finished jelly.  My point is, just go with it... I think light or dark purple water works--just don't forget to add your sugar. 

(Also, please keep in mind this was in North Carolina.. you may need more or less boiling time depending on your location... so I hear.)

Next, I squeezed one lemon into a measuring cup.  I was just shy of 1/4 cup of lemon juice, so I added some from the fridge to get to a 1/4 cup.

Then, I poured the lemon juice in the blue-purple liquid and it turned a pretty fuschia-magenta color! 


(Ok, it doesn't look exactly blue-purple here, but it kinda was...)


(Did I just hear some mom whisper "science fair project"?  I've read about dandelion jelly too.. so there's a start...)

Next, I poured the diluted swamp water/lemon juice mix into a saucepan and turned the heat on high.

As the temperature was increasing, I added 3 tablespoons of pectin and stirred it in.  Next, I added two cups of sugar and stirred that in, until the sugar and pectin was all dissolved.  Then, I allowed it to come to a rolling boil.  Next, I reduced the heat (to about 3 or 4 on my stove) and stirred it for 10-12 minutes until I felt like it was ready.


Golly, I hate to be so ambiguous here (and I'm making all men reading this nervous because I'm talking about feelings...), but I was literally stirring, stressing, calling my sister-in-law, and adjusting the heat until I thought I might be at some consistency that would jell once it cooled.  I simmered it until I got that feeling.  Also, once you add the pectin, a little of the mixture adheres to the whisk.  The little clumps get bigger and you can tell they are jelly-ish.  And that's a good sign.


(See it clinging to the whisk?!)

I had my jars and lids in a simmering pot, and I got the jars out and prepared them to be filled.  I broke out my funnel, and on the first batch, I ignored the part about skimming the foam off the top.  I went straight into ladling into the jars.  What a cowgirl.

You may want to skim off the top so you won't end up with white bubbly in the top of your jelly.  It's just prettier that way, but you do lose a lot of jelly.  On the later batches, I skimmed as it was simmering, and that seemed to help some, but I couldn't get rid of all the bubbles.  I read that adding butter or oil helped, so I threw in a dash of olive oil on batch 4, but couldn't tell a difference.  Since I'm not Aunt Bee, and I'm not entering my jelly at the state fair, I'm going to just have jelly with bubbles.  I tried to put most of the foam that I couldn't get out into a sacrifice jar..  

Then, I put the lids on and placed them in a hot water bath.  With the water boiling, I let them rattle around for 10 minutes.


Hot water bath.  You see the four jars?  I got six "pops" for that batch.  I can't do that math, but I really thought I heard six pops.  I took it as a good sign that all four jars had sealed.


I got the jars out and let them sit.  Before heading into work about an hour later, I could tell these puppies were jelling.  I was super excited!  I also ate some on some rosemary toast (because that's all I had)... and it was gooood.


End method, start discussion:
Now, I had read that you had to bring your mix to a rolling boil before adding the sugar and pectin or it wouldn't jell well.  So, on batch two, I brought the violet/lemon juice to a boil and then added the sugar and pectin.  I added 3.5 tablespoons for the second batch (because I wasn't sure if the first had jelled at this point) and I read elsewhere that this was the equivalent of Ball low sugar pectin to 1.75 oz of low sugar Sure-Jell (which was what the recipe I was following said to use).  I also only cooked for about 8 minutes on low-med heat, stirring.  I think batch one turned out the best, and have went back to using 3 tablespoons of Ball's low sugar pectin, and simmering for about 10 minutes... until I get that feeling.

Annnnd about the pectin... The ingredients in Ball's low sugar pectin include: dextrose (a sugar), fruit pectin (from fruit), citric acid (assists gel; also preserves foods and is the acid found in citrus fruits), calcium ascorbate (retains color; a combination of calcium and vitamin C).  From my brief research, it doesn't appear that any of these things are harmful.  Obviously, I trust a tangerine from a tree more than something powdery from a lab.. but, I don't know any other way to get a good jell.

Well, there's that.  I hope this helps some adventurous violet jelly maker out there.  I am going to cut out a bunch of crap and write a condensed version of the instructions below.  But, if you are out there searching for a recipe and are having the same questions I had, I hope all this helps.


Short and Sweet Instructions:
1. Gather 2 cups of violets.  Non-compacted will do.
2. Clean them if you don't want to live on the edge.
3. Pour 2 c boiling water over the violets, cover, and let sit for 2 to 24 hours.
4. Strain the violet water.  If you don't have 2 cups, add a little water until you do have 2 c.
5. Add 1/4 c lemon juice.
6. Pour in a saucepan and turn the heat to high.  In the meantime, add 3 tablespoons Ball low sugar pectin (or apparently 1 packet of low sugar Sure-Jell).  Stir in.  Then add 2 c sugar.  Stir in.
7. Bring violet/lemon mix to a rolling boil, and make sure pectin and sugar dissolve.
8. Reduce heat to med-low and continue whisking, about 10-12 minutes.  You may skim the foam while simmering if you please.
9. When the mixture begins to form a little adhesive on the whisk, take it as a good sign, and ready your jars. 
10. Skim the top if you feel the need/pressure.
11. Ladle into jars.  Put the lids on jars.
12. Boil in a hot water bath for 10 minutes.
13. Listen for the pops.. let cool.. and eat that mess up.

Gotta go!  (I ate too much of the jelly!)